How to Install Windows
Installing Windows is a comparatively straightforward task,
as daunting as the idea might sound if you've never done it before. It's mainly
easy to install Windows with a little help! No need to take your PC in to the
local experts for a simple reinstalls - you can install Windows all by
yourself! There are some easy Steps to Follow for Windows 8, 7 & XP. You
can easily install windows 7, 8 and XP by below steps.

How to Install Windows
Simple
Steps to Follow for Windows 7:

Step1:
Turn ON your PC and Press ‘F2’ Continuously. There will come
up and option to boot through CD/DVD. Select that option. Windows will start
loading its files
Step2:
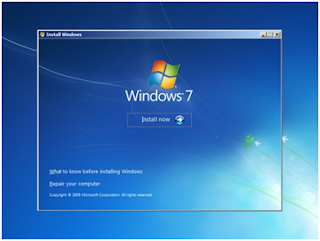
Now you will get the Windows Setup Window. This is the part
to select Language for your windows. Select ‘English’ and click “Next”. Also
there will be a ‘INSTALL NOW’ button. Click on it and proceed to next step.
Step3:
There will be a license agreement. Check on ‘I ACCEPT’ and
proceed to NEXT. After that there will be an option to install windows.
‘UPGRADE’ and ‘CUSTOM’. Right now we are installing a clean version so, Click
on CUSTOM.
Step4:
In this step you will do partitioning of your drive. Be careful,
this is the most important part of the Installation. In this you will allocate
spaces to your drive. If you want to create a new drive, simply click on a
drive and then click ‘NEW’. A new drive will be created.
Step5:
When you have created the drives, Simply Select the drive in
which you want to install windows. Click ‘Format’, this will erase all the
previous data on you that drive. Click on ‘NEXT’ to proceed.
Step6:
Now you windows will start installing its files. Grab a cup
of coffee and wait for a few minutes while it install. During this process
don’t plug in or off your device. It might cause interruption and you might
loose your data and have to begin the process all over again.
Step7:
Now, when you files are installed your PC will be rebooted
and now you will see is a ‘User Settings’ Screen. Simply add your Name and
password and proceed to ‘NEXT’
Step8:
In this step you have to activate your windows. Simply look
at the back of your Windows CD/DVD cover there will be a PRODUCT KEY. Add this key
into your PC and Click ‘NEXT’.
Step9:
Now you have Installed you windows. Give the desired
information the Windows Step guide will ask, like Time Zone, Update Timing and
Your Computers location. There are three types of location. ‘WORK’, ‘PUBLIC’
and ‘HOME’. Select on anyone of the them according to your location. It only
add sharing security according to your location.
Easy
Steps to Follow for Windows 8:

Part 1 of 3: Purchase Windows 8:
- Navigate to the Sources section below this article and click on the Microsoft Windows link that contains the word "purchase" in the URL.
- Navigate to the section entitled "Purchase Windows 8," and click on the link for "Buy Windows."
- Click on "Get Started" after the landing page loads. Your computer will install the Windows 8 Upgrade Assistant, which will walk you through purchasing Windows 8 for your computer.
- Follow the instructions and prompts provided by the Windows 8 Upgrade Assistant. The upgrade assistant will require you to enter your name and credit card information, and will provide you with a receipt and product key for Windows 8.
- Click "Next" after the upgrade assistant has provided you with the product key. Windows 8 will then start downloading to your computer, and display the Windows 8 Setup Wizard.
Part 2 of 3: Install Windows 8:
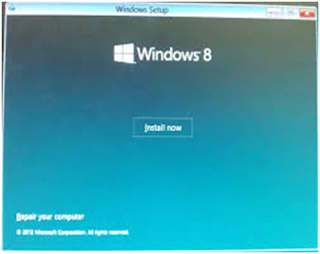
- Click on "Install now" after the Windows 8 Setup Wizard appears on your screen.
- Enter the product key you were provided with at the time of your Windows 8 purchase.
- Click "Next."
- Review the Windows 8 license terms, then place a checkmark next to "I Accept the license terms."
- Click on the "Next" button.
- Then, Select from "Upgrade" or "Custom" Installation. The upgrade option will allow you to keep all your current files, settings, and applications, whereas the custom option will only install Windows 8 without saving your data.
- Click "Install." Your computer will restart several times while it installs Windows 8, and will display the Setup Wizard after Windows 8 has been successfully installed.
Part 3 of 3: Set Up Windows 8:
- Select any color of your choice from the "Personalize" screen. The color you choose will be the designated color theme for Windows 8, and can be changed at any time.
- Enter a name for your computer below the field entitled "PC name."
- Click on "Next."
- Choose your current network settings from the "Settings" screen, then click "Next." You will be asked whether you are using a home or work network, or if you are using a public network.
- Sign in to your PC using a Microsoft account or local account. The Microsoft account option requires you to create or sign in with a Microsoft username and password. The local account option requires you to create a username and password to be used specifically for your personal account on the computer.
- Wait for the Windows 8 user interface to load. Your screen will now display a new series of Windows 8 icons, and your desktop can be accessed by clicking on the "Desktop" icon.
Easy Steps to Follow for Windows XP:

Part 1: Installation:
- Setup will load files necessary to begin the installation, which may take a few moments. Once the loading is complete, you will be taken to the Welcome screen.
- Press ENTER to begin installation: Once the loading is complete, you will be taken to the Welcome screen. You are given several options, but if you are installing or reinstalling Windows XP, you’ll want to press ENTER to start the installation configuration.
- Read the License Agreement. This document tells you what you can and can’t do with Windows, and your rights as the consumer. After reading, press F8 indicating you agree to the terms.
- Select the partition you want to install on. You will see a list of available partitions on your installed hard drives. If you are installing Windows XP on a new hard drive, you should see only one entry labeled "Unpartitioned space." If you have a previous version of Windows or Linux installed on your computer, you will potentially have multiple partitions.
- Create a new partition. Select the Unpartitioned space and press “C”. This will open a new screen where you can set the partition’s size from the available space. Enter the size in megabytes (MB) for the new partition and then press ENTER.
- Select your new partition. Once you’ve created your installation partition, you will be returned to the partition selection screen. Select your new partition, usually labeled "C: Partition 1 [Raw]" and press ENTER.
- Select "Format the Partition using the NTFS File System" and press ENTER.
- Wait for the format to complete. The system will now format the partition. The length of time this process requires depends on the speed and size of the drive. In general, the larger the partition, the longer the process will take.
- Wait for the Setup files to copy. Windows will now start copying files from the installation disc and prompt you to reboot the computer when the process is completed. Press ENTER when prompted to reboot, otherwise it will do so automatically after 15 seconds.
- Allow the computer to boot normally. You will see the message asking you to press a key to boot from CD. Ignore it and allow the computer to continue booting from the hard drive. You will see the Windows logo as the Setup program loads.
- Wait for the installation to proceed. After the Windows logo goes away, you will see a list of steps remaining on the left side of the screen, and tips for using windows on the right. The time remaining for the installation will be displayed below the list of steps remaining.
- Choose your language and region settings. During the installation process a dialog window will appear, asking you to choose your Regional settings. Select appropriate settings native to your area. Click the Next button when that is completed.
- Enter your Product Key
- Set your computer’s name.
- Select your time zone. Ensure that the date/time are correct. Click "Next" to continue.
- Choose your network settings. Almost all users installing Windows XP on a home or personal computer can leave "Typical Settings" selected for Network Setup. If you are installing Windows XP in a corporate or academic environment, check with the system administrator, though Typical Settings will most likely work.
- Wait for the installation to finalize.
Part 2: Completion:
- Set your display preferences
- Set your connection preferences. If your computer is connected to the internet, select your connection type. Press Next to continue.
- Activate your copy of Windows.
- Create Users. After the Activation Process, a window will appear allowing you to select the users for the computer. Enter your name, and the names of others who will be using the machine. Press Next to continue.
- Start using Windows.
Other Beneficial Links:
No comments:
Post a Comment